Bathroom Remodel
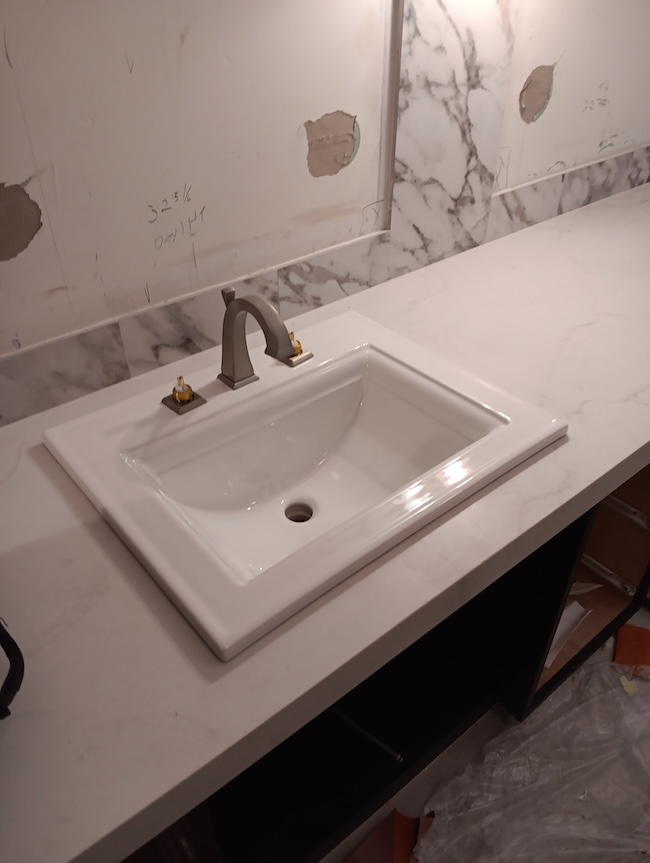
Even a simple bathroom remodel can have unexpected challenges. Aspen Home Improvement was asked to assist with a like for like swap of fixtures and a tile refresh on one such project. With a few bumps along the road (due largely to shipping errors), the bathroom came together nicely. Updated fixtures shown are from Kohler. When our sinks and tubs arrived damaged, Kohler customer service was great to work with. They quickly sent replacement products to help keep the work on task.
Benefits of new tile
New tile in a bathroom can make a significant difference, transforming the space with both style and function. Freshly installed tiles can instantly brighten the room, adding a clean, polished look that enhances the overall aesthetic. Modern tile options come in a variety of colors, textures, and patterns, allowing for customization to fit any design vision, whether it’s a sleek, contemporary feel or a more traditional vibe. Additionally, new tile improves the durability and cleanliness of the bathroom. It’s water-resistant, easy to maintain, and less prone to staining or damage compared to older surfaces. With its long-lasting qualities, new tile not only elevates the room’s appearance but also offers practical benefits for years to come.
Like For Like
In a remodel, “like for like” refers to replacing or upgrading an existing item or feature with one that is very similar or identical in terms of function, style, and material. The goal is to maintain the same appearance or use without making significant changes to the layout or design. For example, if you’re replacing old bathroom lighting this would mean replacing the sconces with similar newer lighting. Removing wall mounted lighting and substituting track lighting, would not be a like for like swap. This approach is often used to preserve the overall look and feel of a space while updating or improving certain elements.

Renovations provide an ideal opportunity to assess your plumbing.
During a toilet replacement is an excellent time to have your residential plumbing inspected. With the toilet already removed and possibly water lines drained, a certified technician can use a camera to look in detail at the current state of your pipes. Pipe lining is one popular, albeit expensive, solution to repair and restore the life of your plumbing.
Inspecting plumbing for pipe lining involves a careful examination of the existing pipes to determine their condition and suitability for lining, which is a method of repairing and reinforcing old or damaged pipes without having to replace them entirely. Here are the key steps involved in the inspection process:
1. Initial Assessment: A professional plumber or technician will first assess the general condition of the plumbing system, identifying any areas where there may be leaks, corrosion, or damage. This is often done visually, by checking access points like basements, crawl spaces, or utility rooms.
2. Camera Inspection: One of the most effective methods for inspecting plumbing before pipe lining is using a high-definition video camera attached to a flexible cable. The camera is inserted into the pipes through an access point, usually through a clean-out or drain. As it moves through the plumbing, it provides real-time footage of the pipe’s interior, allowing the technician to spot issues like cracks, blockages, tree root intrusion, or corrosion.
3. Evaluating Pipe Size and Material: The technician will check the diameter and material of the pipes to ensure they are suitable for the lining process. Pipe lining typically works best on pipes made from materials like clay, cast iron, or PVC. Older pipes, or those with too many bends or issues, may not be ideal candidates for lining.
4. Assessing the Extent of Damage: If the pipes show signs of significant damage, such as major corrosion, large holes, or collapsed sections, the technician will determine whether pipe lining is feasible or if a full replacement is needed. Pipe lining is typically used for minor to moderate damage but may not be effective for severely compromised pipes.
5. Confirming Accessibility: The technician will also check how easily the pipes can be accessed for lining. While pipe lining is minimally invasive, certain obstructions or difficult-to-reach areas might pose challenges to the process.
6. Preparation for Lining: Once the inspection is complete and it’s determined that pipe lining is a viable solution, the plumber will prepare the pipes by cleaning them, typically using a high-pressure water jet or mechanical scraping. This step ensures that the lining material can bond properly to the interior surface of the pipes.
After the inspection, if everything is in order, the technician can move forward with applying the pipe lining, a process that involves inserting a resin-coated liner into the pipe and curing it to create a new, durable pipe within the old one. The benefit is that it minimizes the need for digging up walls, floors, or landscaping, making it a less disruptive and cost-effective solution for many plumbing issues.
(c) 2022-2025 Aspen Home Improvement. All Rights Reserved.
